
搭建前的准备
搭建
本文记录的是 CentOS 7.4 上搭建 Nexus Repository Manager OSS 3.x 的过程,其他版本的搭建需要参考官方文档相应版本的说明!
JDK
必须是 Oracle JDK 1.8, Open JDK 不行!
添加用户并赋予权限
useradd nexus

tar -zxvf nexus-3.12.0-01-unix.tar.gz -C /home/nexus

visudo
nexus        ALL=(ALL)       NOPASSWD: ALL

ln -s /home/nexus/nexus-3.12.0-01 /opt/neuxs

sudo chown nexus:nexus /opt/neuxs
sudo chown nexus:nexus -R /home/nexus/nexus-3.12.0-01
sudo chown nexus:nexus -R /home/nexus/sonatype-work
修改环境变量与配置
vim ~/.bashrc
NEXUS_HOME="/opt/nexus"
source ~/.bashrc

vim /opt/nexus/bin/nexus.rc
run_as_user="nexus"
配置服务
vim /etc/systemd/system/nexus.service

[Unit]
Description=nexus service
After=network.target

[Service]
Type=forking
LimitNOFILE=65536
ExecStart=/opt/nexus/bin/nexus start
ExecStop=/opt/nexus/bin/nexus stop
User=nexus
Restart=on-abort

[Install]
WantedBy=multi-user.target
加载服务并启动
sudo systemctl daemon-reload
sudo systemctl enable nexus.service
sudo systemctl start nexus.service

# 查看启动日志
tail -f /home/nexus/sonatype-work/nexus3/log/nexus.log
查看首页
访问http://10.4.121.202:8081即可,端口信息可以通过/opt/nexus/etc/nexus-default.properties修改。
默认的登陆账号admin/admin123。
查看 Nexus Repository Manager OSS 3.x 默认库
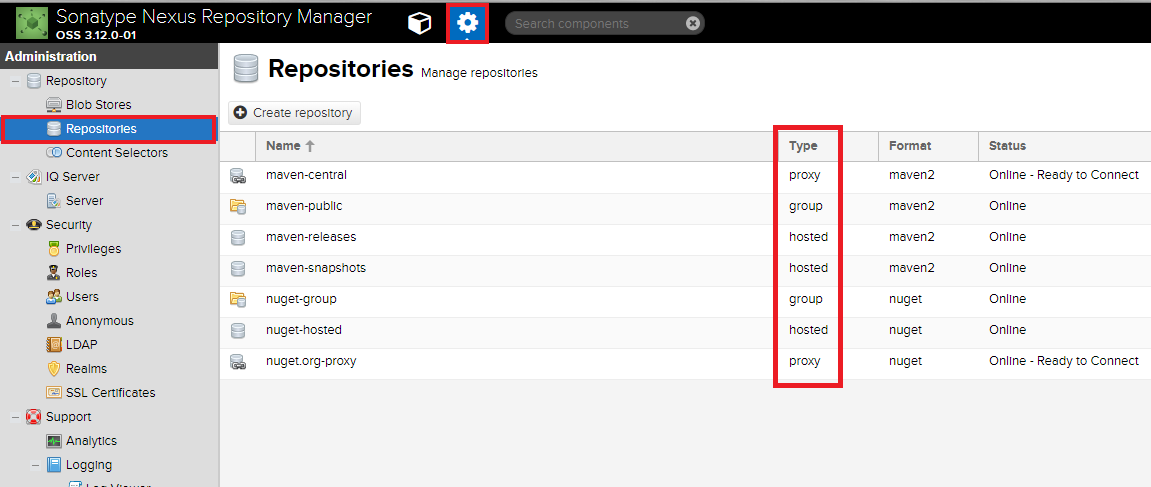
从图中可以看到 nexus repository type 有三种:proxy、group、hosted。
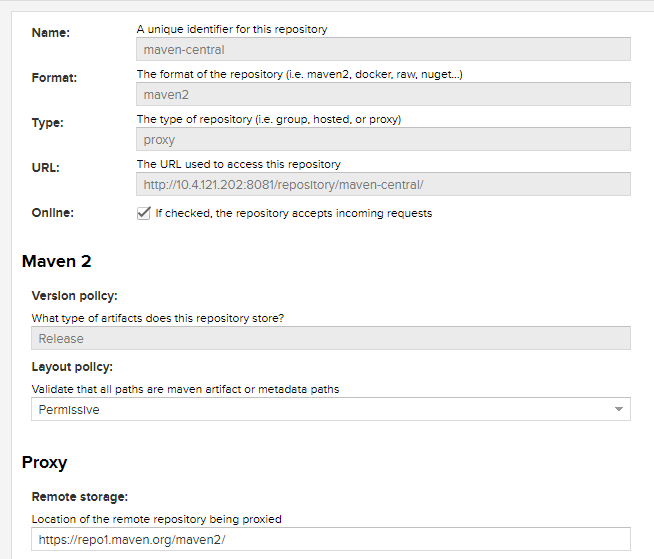
proxy
代理可以指向其他已经存在的 remote repository,如指向中心仓库https://repo1.maven.org/maven2/。
在使用 proxy 的时候需要查找索引文件,由于索引文件比较大,建议离线下载然后上传到 nexus 服务器。
首先去http://repo.maven.apache.org/maven2/.index/,找到nexus-maven-repository-index.gz和nexus-maven-repository-index.properties,下载下来。
创建 nexus blob,如下图:
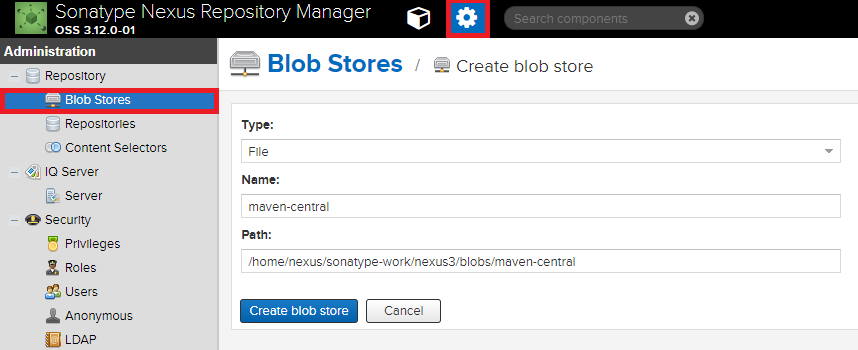
将下载好的nexus-maven-repository-index.gz和nexus-maven-repository-index.properties放入/home/nexus/sonatype-work/nexus3/blobs/maven-central/.index即可
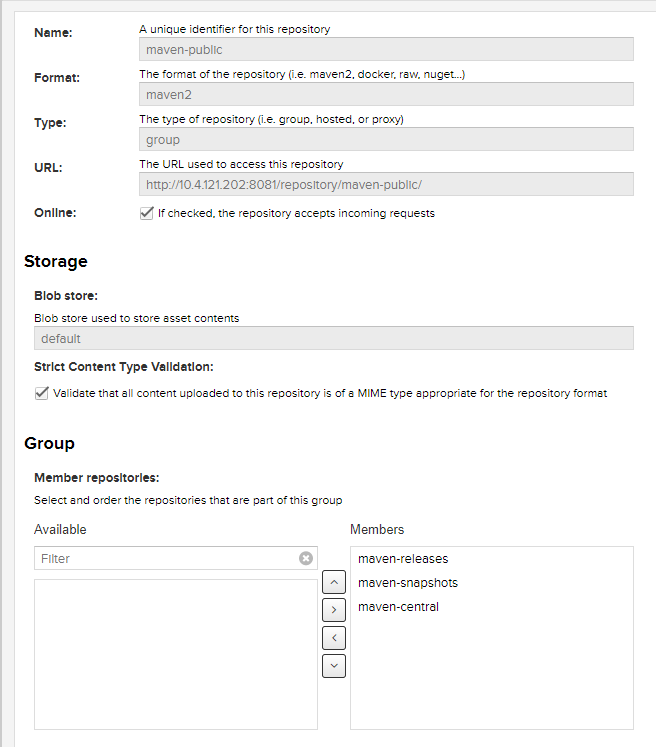
group
指定一组 repositories,该地址(url)将作为统一访问的入口。
hosted
本地 repository,可以将你自己编写的第三方 Maven 项目上传(deploy)到这里。
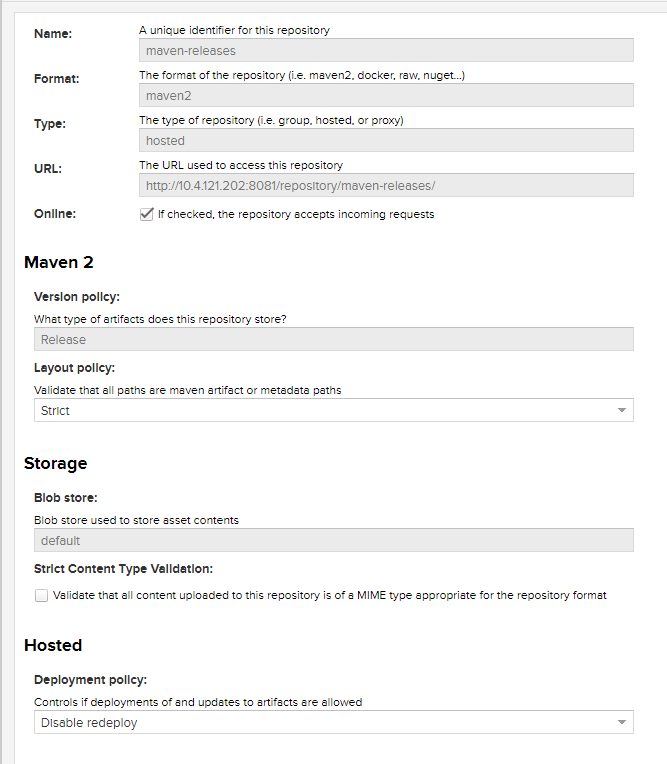
Maven2 repository 配置项介绍
Maven Version Policy (Maven 项目的版本策略)
在上面的三种类型里面可以看到 Maven Version Policy 这个配置项,那么它是什么意思呢?
Maven Repository 可以分为三种,不同的版本策略的 Maven 项目会上传(deploy)到相应的 Maven Repository 中。
- Release:发布。可以将 Maven 存储库配置为适合发布版本策略的组件。 maven-central 就是使用 Release 策略。并且每一次发布的版本号不能相同!
- Snapshot:快照。通常使用 Snapshot 版本策略对同一个版本执行持续开发。 pom.xml 中的版本信息
<version>必须以-SNAPSHOT结尾,如1.0-SNAPSHOT。 Snapshot 策略允许重复上传,实际上传到库中的版本信息还包括由日期/时间戳和枚举器组成的数字,如com/company/group/es_analyser/1.0-SNAPSHOT/es_analyser-1.0-20180607.070533-1.jar,但在检索的时候仍可使用1.0-SNAPSHOT,并返回最新版本的依赖。 存储库管理器和客户端工具管理将快照版本转换为时间戳记值的元数据文件。 - Mixed:混合版本策略允许您在一个存储库中支持这两种方法。
上传本地项目到 Nexus hosted repository
修改 Maven settings.xml 配置
默认${USER_HOME}/.m2/settings.xml,指定server的登陆信息,server中的id可以随便起,但是在项目使用的时候要注意,repository的id一定要和它匹配。
<servers>

    <server>
      <id>nexus</id>
      <username>admin</username>
      <password>admin123</password>
    </server>

</servers>
修改 pom.xml
在 Maven 项目中的 pom.xml 中添加如下代码。
<!-- 指定 repositories 信息,配置后会优先下载私服库中的依赖。 -->
<repositories>
    <repository>
        <id>nexus</id>
        <url>http://10.4.121.202:8081/repository/maven-public/</url>
        <releases>
            <enabled>true</enabled>
        </releases>
        <snapshots>
            <enabled>true</enabled>
        </snapshots>
    </repository>
</repositories>

<!-- 指定 pluginRepositories 信息 -->
<pluginRepositories>
    <pluginRepository>
        <id>nexus</id>
        <url>http://10.4.121.202:8081/repository/maven-public/</url>
        <releases>
            <enabled>true</enabled>
        </releases>
        <snapshots>
            <enabled>true</enabled>
       </snapshots>
    </pluginRepository>
</pluginRepositories>

<!-- 指定用于发布(deploy)项目的 repository 信息 -->
<distributionManagement>

    <repository>
        <id>nexus</id>
        <url>http://10.4.121.202:8081/repository/maven-releases/</url>
    </repository>

    <snapshotRepository>
        <id>nexus</id>
        <url>http://10.4.121.202:8081/repository/maven-snapshots/</url>
    </snapshotRepository>

</distributionManagement>
将项目打包上传到 Nexus Repository
mvn deploy
将 jar 包上传到 Nexus Repository
mvn 命令的语法
mvn deploy:deploy-file \
-DgroupId=<group-id> \
-DartifactId=<artifact-id> \
-Dversion=<version> \
-Dpackaging=<package-type> \
-Dfile=<file-path> \
-DrepositoryId=<server-id> \
-Durl=<repository-url>
举个栗子:把ojdbc6.jar上传到 maven repository
mvn deploy:deploy-file -DgroupId=com.oracle -DartifactId=jdbc -Dversion=6.0 -Dfile=D:\Oracle\instantclient_11_2\ojdbc6.jar -DrepositoryId=nexus -Durl=http://10.4.121.202:8081/repository/maven-releases/
然后就可以通过在pom.xml中指定<dependency>引用依赖了
<dependency>
    <groupId>com.oracle</groupId>
    <artifactId>jdbc</artifactId>
    <version>6.0</version>
</dependency>
将 jar 包安装到本地
mvn install:install-file -Dfile=<jar-absolute-path>(D:/xxxx/x.jar) -DgroupId=<group-id> -DartifactId=<artifact-id> -Dversion=<version>(版本号,例如1.0) -Dpackaging=jar